A well-structured menu enhances your website’s navigation and improves user experience. In Ciriks Website Builder, setting up a menu is simple. Follow this step-by-step guide to create and manage your menus efficiently.
Step 1: Log In & Access the Menu Settings
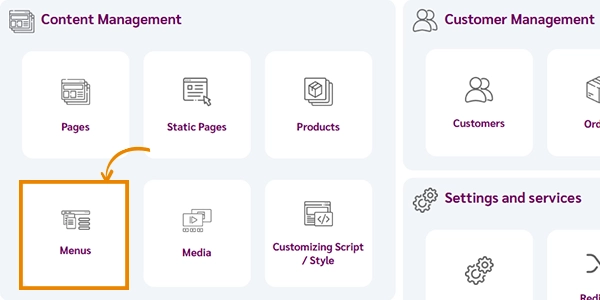
Log into your Ciriks Management Panel, navigate to Content Management in the main menu, and select Menus to start managing your site’s navigation.
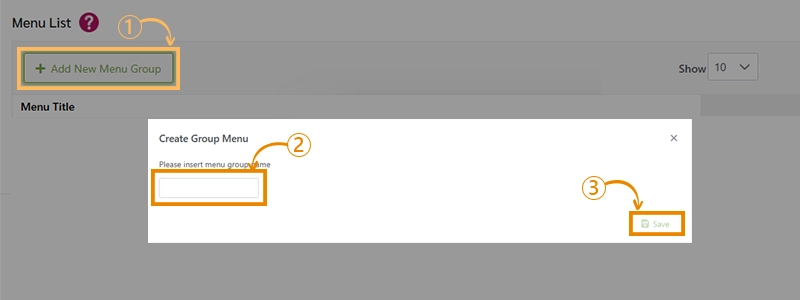
Step 2: Creating a Menu Group
- Click Add New Menu Group.
- Assign a relevant name to the group based on its purpose.
Example: "Header Menu" for the website’s main navigation.
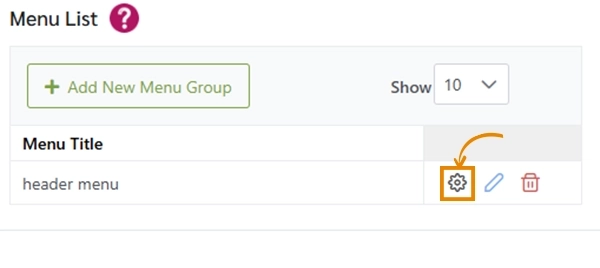
Step 3: Adding Menu Items
- Click Manage Menu.
- Click Add Menu Item.

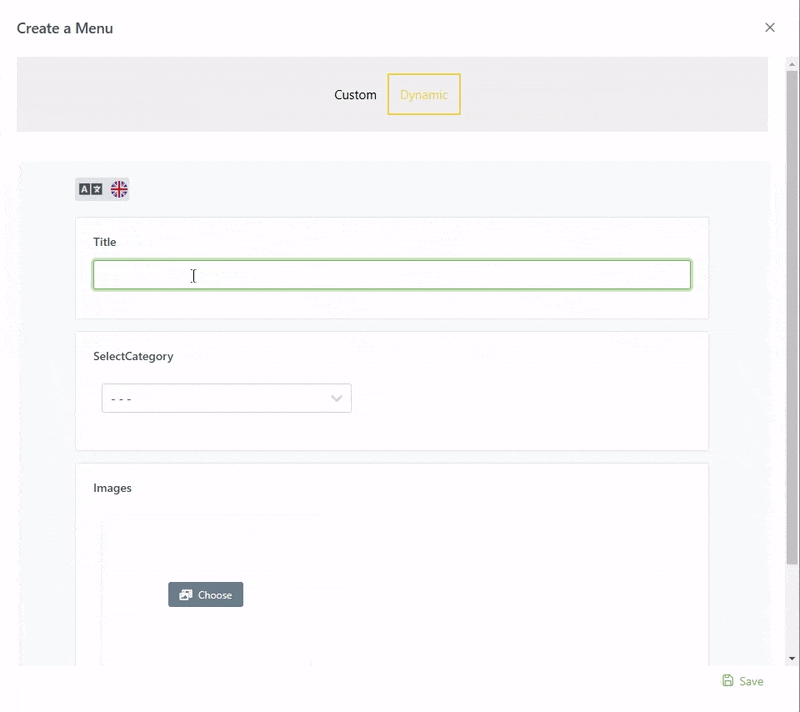
- Choose between Custom or Dynamic menu items:
Custom Menu Items
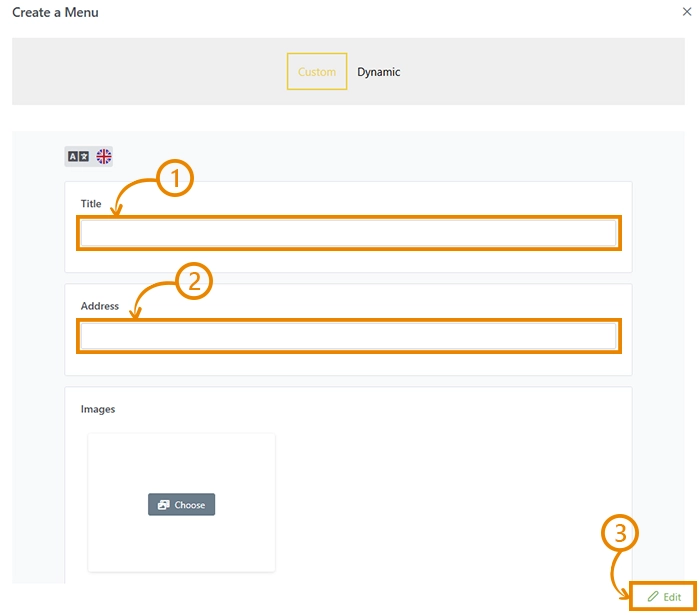
Dynamic Menu Items
- Select the menu item name (e.g., Home Page).
- Choose the category where the page is located.
- Select the desired page from the list.
- Click Save.
Step 4: Displaying the Menu in a Component
- Navigate to the relevant website component.
- Insert the created menu. Learn how to insert a menu into a component.
Pro Tips for Efficient Menu Management
- Plan ahead: Define your menu structure before adding items.
- Edit menus anytime: Add links after pages are finalized. Learn how to edit a menu.
- No limitations: Create multiple menus for different sections.
- Automatic updates: Changes update across all pages instantly in Ciriks Website Builder.
Final Thoughts
By following these steps, you can create a well-structured menu that improves navigation and user experience. Ready to refine your site’s menu? Explore more customization options in Ciriks Website Builder.
Ready to Launch Your Online Presence?
Dreaming of a stunning website but unsure where to begin? Our cutting-edge website builder is your ultimate solution. Designed for ease of use, it offers extensive customization to perfectly align with your business goals. Create a professional, eye-catching website effortlessly and get online in no time. Transform your vision into reality today!
Start Now